Vue Configuration File
Set up your Vue environment
1. Background
the address of the backend server is different in the local dev and production environments
- local - http://localhost
- production server - http://my-blog-domain.kr
TXTwe use localhost during development, but when deployed to the
but when deployed to the real server, you should use a domain or IP
if you look at the current vue blog implementation, the backend address of the local development environment is tightly packed as shown below.
LoginForm.vue
JAVASCRIPT .post("http://localhost/api/login", ... )
PhotoView.vue
JAVASCRIPT  getImage() {
    if (this.post.upFiles.length > 0) {
      return `http://localhost/upfile/...`;
    }
    ...
  }
serc/service/api/index.html
JAVASCRIPTaxios.defaults.baseURL = "http://localhost";
PostDetail.vue
HTML<UpfileList
  :getImagePath="(file) => `http://localhost/upfile/${file.genName}`"
/>
requests should be sent to localhost when testing and developing locally, and should work with a purchased domain or real IP address when deployed to a live server
to accomplish this, we create what we call a configuration file and swap it out when we need to apply different values depending on the context.
2. .env file
on Linux, files prefixed with a dot (.) are treated as hidden files.
TXT.env
.env.development
.env.production
.nvm
- of course, on Windows, they all look like normal files.
- on Linux or Mac, if you browse the directory with the usual commands (
ls command), these files will not appear.
vUE follows this practice and creates a configuration file as shown below, so that it works to use different files for the local test environment and the actual deployment.
TXT.env.development - for testing locally (when running npm run serve)
.env.production - for pulling output for a real server deployment (when running npm run build)
files as shown below.
TXT[BLUGVUE]
 +- public
 +- src
 +- ...
 +- .env.development (+)
 +- .env.production (+)
 +- ...
 +- package.json
- src folder, side by side with the package.json file
in the new file, write the following
.env.development
TXTVue_app_mode=dev
Vue_app_backend_host=http://localhost
- if the port of the backend server is 8899, specify a value such as
http://localhost:8899
.env.production
TXTVue_app_mode=production
Vue_app_backend_host=http://blog-demo.kr
- you can also put the IP address of the server in the domain location (like
http://220.11.32.123)
there are conventions when defining environment variables in VUE.
TXTmust begin with [VUE_APP_]
above we simply set up two environment variables, VUE_APP_MODE is defined to identify the current development environment (independent of application features)
the VUE_APP_BACKEND_HOST value is the address to use when sending requests from vue to the backend.
3. Accessing Environment Variables
before we read http://localhost from the environment variable file we created above, let's test it first.
open the /src/main.js file and simply type in the following
JAVASCRIPTimport ...
Vue.config.productionTip = false;
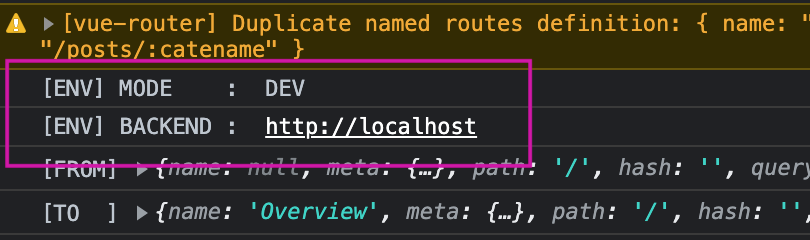
console.log("[ENV] MODE : ", process.env.VUE_APP_MODE);
console.log("[ENV] BACKEND : ", process.env.VUE_APP_BACKEND_HOST);
new Vue({
....
}).$mount("#app");
- new Vue(...) Above, we're going to print the environment variable values to the console
then run your local development server from vscode.
BASH$ npm run serve
when you open the dev tools in your browser and access your blog, you should see the following output in the console.
4. Apply it to your code
click on the search icon on the left side of vscode
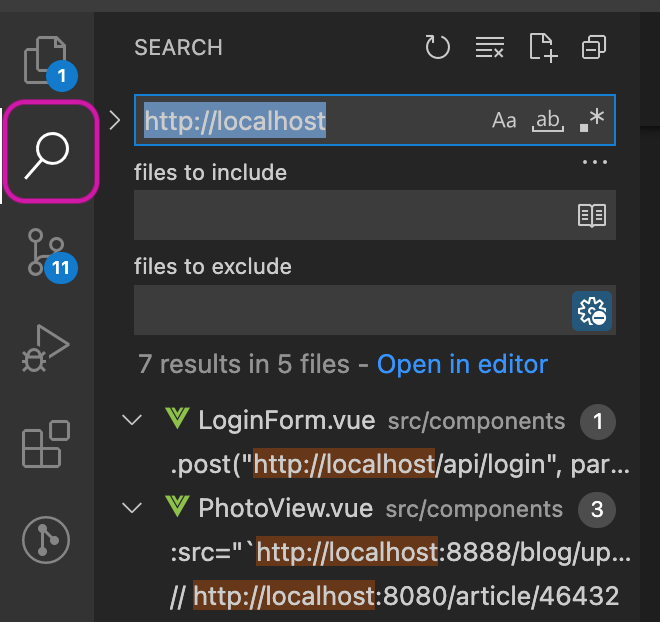
replace http://locahost wherever it appears with the following.
src/service/api/index.js
at the top of the file is where we defined the baseURL
JAVASCRIPTimport axios from "axios";

axios.defaults.baseURL = "http://localhost";

axios.interceptors.request.use(...);
replace it with process.env.VUE_APP_BACKEND_HOST like this
JAVASCRIPTimport axios from "axios";

axios.defaults.baseURL = process.env.VUE_APP_BACKEND_HOST;

axios.interceptors.request.use(...);
- replace all the remaining files with the values of the environment variables as shown above.
stop the development server and run it again.
You must stop and restart the development server for the changes to take effect.
5. Check your development environment
when you open a browser and connect to the development environment, the requests sent to the backend server should be processed well.
6. Deployment Environment
when you run npm run build to pull out the output, it will automatically read and process the contents of the .env.production file.
after moving the final output files from the /dist folder to the resources folder of your spring backend and running the server, the console should display the values of the environment variables in the .env.production file as shown below.
TXT[ENV] MODE : PRODUCTION app.c604d5db.js:1
[ENV] BACKEND : http://blog-demo.kr app.c604d5db.js:1
- when you copy the output from
npm run buildto the backend server, you may find that the application is small due to a different domain or port number. - here, we only check that the environment variables are reflected correctly as above.